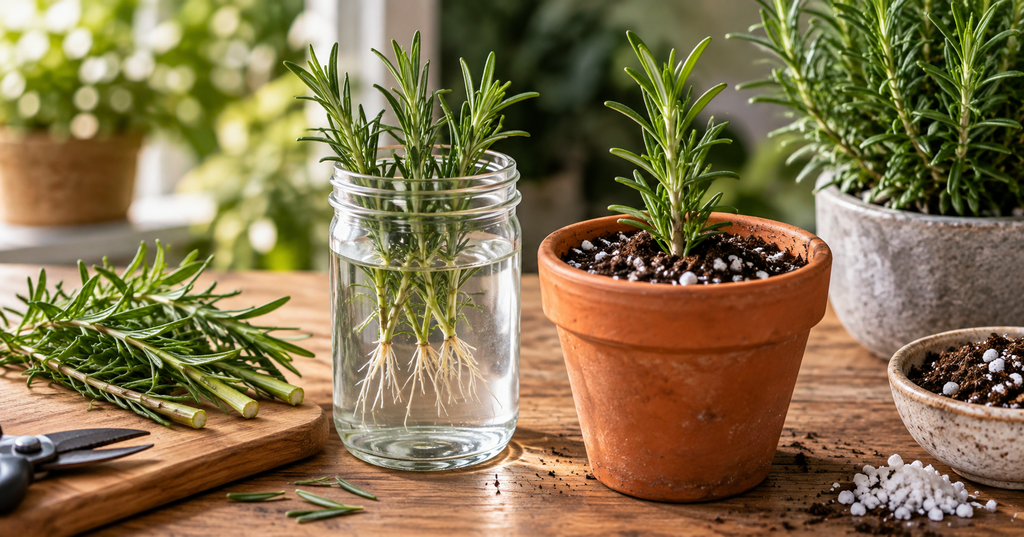
You can grow rosemary from cuttings in 2–6 weeks by taking 4–6 inch semi-ripe stems, stripping the lower leaves, and rooting them in either water or a gritty, well-draining mix. Soil propagation is more reliable long-term; water shows roots faster but needs daily changes and careful transplanting. This guide is part of our broader indoor herb garden plans collection, so you can build out a full herb setup once your cuttings take root.
This guide gives you direct, step-by-step instructions for both methods, plus timing, success tips, and troubleshooting to keep your cuttings from rotting or browning.
Quick Answers on most Ask Questions
Can you root rosemary cuttings in water?
Yes. Place 4–6 inch cuttings in a glass with 1–2 inches of water, keep leaves above the surface, and change the water daily. Expect roots in 2–6 weeks. Transplant to soil once roots are ~1 inch long.
Can you put rosemary cuttings straight into soil?
Yes, and it’s often better. Insert prepared cuttings 1–2 inches into a pre-moistened, gritty mix (e.g., 50% perlite, 30% coco coir, 20% compost). Keep warm with bright, indirect light. Success rates are higher, and roots are stronger than with water propagation.
What time of year do you take rosemary cuttings?
Best: late spring to early summer when new growth is semi-woody (firm but not fully hardened). Early fall also works. Avoid deep winter and the hottest mid-summer weeks.
Is rosemary easy to grow from cuttings?
Yes, rosemary is one of the easiest herbs to clone, and it pairs well with other easy propagators.
If you enjoy this project, you’ll probably also want to grow basil from cuttings using a similar technique. The main pitfalls are using woody stems, overwatering, and not changing water frequently.
- Water vs Soil: Which Method Should You Choose?
- Step-by-Step: How to Grow Rosemary from Cuttings in Water
- Step-by-Step: How to Grow Rosemary from Cuttings in Soil
- Timing & Seasonal Guide
- Troubleshooting: Why Cuttings Turn Brown or Rot?
- Varieties & Flavor
- Aftercare
- Common Mistakes to Avoid
- Frequesntly asked Questions
- Final Thoughts
Water vs Soil: Which Method Should You Choose?
| Factor | Water Propagation | Soil (Gritty Mix) Propagation |
| Speed to visible roots | 2–3 weeks (often faster) | 3–5 weeks |
| Overall success rate | ~50–60% in typical home setups | ~80–90% with gritty mix |
| Root quality | Fine, water-adapted roots | Denser, soil-ready roots |
| Maintenance | Change water daily; watch for rot | Water only when slightly wilted; avoid soggy mix |
| Best for | Beginners who want to “see” roots; small batches | Reliable results; larger batches; long-term plants |
Recommendation: For the highest success and strongest plants, root in soil. Use water if you prefer visual progress or only have a few cuttings.
Step-by-Step: How to Grow Rosemary from Cuttings in Water
Follow these steps for clean, rot-free water propagation.
1) Take the right cuttings
- Length: 4–6 inches (10–15 cm).
- Type: Semi-ripe (new growth that’s firm but not fully woody). Avoid old, brown, woody stems.
- Cut: Just below a leaf node at a 45° angle with clean, sharp snips.
2) Prep the stem
- Strip leaves from the bottom half (or bottom 2 inches). No leaves should sit in water.
- Optional: Dip the cut end in rooting hormone to boost success (helps, not required).
3) Root in water
- Place cuttings in a small glass or jar with 1–2 inches of water. Keep leaves above water.
- Location: Bright, indirect light; room temperature; a windowsill works well.
- Maintenance: Change water daily to prevent rot and replenish oxygen.
4) Wait for roots
- Timeline: 2–6 weeks. Tiny white roots will appear at the nodes.
- Tip: Don’t move or disturb cuttings excessively while roots form.
5) Transplant to soil
- When roots are ~1 inch (2.5 cm), pot into a well-draining mix (add perlite or use a cactus/succulent blend). For a reliable ratio, see our well-draining potting mix for herbs guide before you pot up.
- Harden off for ~1 week: gradually increase light and outdoor time if moving outside.
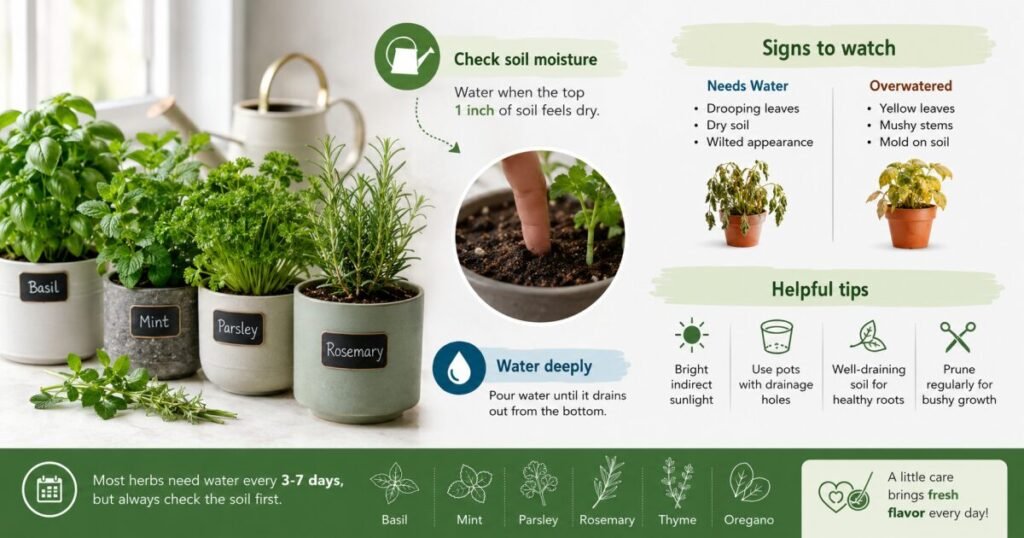
- Water only when the top inch of soil is dry. Rosemary hates soggy roots.
Read more: Indoor Hydroponic Herb Garden: How it Works and How to Start
Step-by-Step: How to Grow Rosemary from Cuttings in Soil
This method yields stronger roots and higher survival rates.
1) Prepare a gritty, well-draining mix
- Simple recipe: 50% perlite, 30% coco coir (or peat-free potting mix), 20% compost. Avoid heavy garden soil.
- Pre-moisten the mix, so it’s damp but not wet.
2) Take and prep cuttings
- Same as the water method: 4–6 inch semi-ripe stems, cut below a node, strip lower leaves.
- Optional: Dip cut ends in rooting hormone (increases success by ~35% in trials).
3) Plant the cuttings
- Make a hole first (pencil or chopstick) so you don’t wipe off rooting hormone.
- Insert 1–2 inches deep, gently firm the mix, and make sure no leaves touch the surface.
- Spacing: Multiple cuttings can share a 6-inch pot; separate later once rooted.
4) Create a humid microclimate (optional but helpful)
- Cover with a clear bag or propagation dome to retain humidity. Inflate the bag slightly so it doesn’t touch leaves.
- Place in bright, indirect light and a warm spot.
5) Watering discipline (critical)
- Water only when cuttings show slight wilting or the mix feels dry. Overwatering is the #1 cause of failure.
- If using a bag, check for condensation. If none appears, lightly mist or water and reseal.
6) Root check and pot-up
- After 3–5 weeks, gently tug to feel resistance (roots formed).
- Move to individual pots with well-draining mix, following the same spacing tips in our container herb garden setup guide. Gradually acclimate to stronger light.
Timing & Seasonal Guide
| Season | Success Rate | Rooting Time | Notes |
| Late Spring (Apr–May) | ~88% | 21–28 days | Ideal: semi-ripe growth; use bottom heat if cool |
| Early Fall (Sept–Oct) | ~82% | 28–35 days | Good second window; protect from early frosts |
| Summer (peak heat) | ~45% | 35+ days | Provide shade; avoid midday sun; light misting |
| Winter | ~12% | Rarely roots | Wait for spring |
Best months: Late spring to early summer; early fall is a strong second choice.
72-Hour Care Checklist
- Hour 0: Take cuttings in the morning when stems are turgid (well-hydrated). Use clean tools and pots.
- Hour 0–2: Strip lower leaves; optional rooting hormone; plant or place in water immediately.
- Day 1: Confirm bright, indirect light; no direct hot sun. Check moisture (damp, not wet).
- Day 2: If in water, change it. If in soil, do not overwater; wait for slight wilt before watering.
- Day 3: Look for firm leaves and steady color. Browning or mushy stems = reduce moisture, improve airflow.
Troubleshooting: Why Cuttings Turn Brown or Rot?
| Symptom | Likely Cause | Fix |
| Leaves brown within 2–3 days | Old/woody cuttings; store-bought herbs dried out; too much direct sun | Use fresh semi-ripe tips; move to bright indirect light; increase humidity slightly |
| Stems turn black/mushy at base | Water not changed; soggy soil; leaves submerged | Change water daily; improve drainage; strip more lower leaves |
| No roots after 6 weeks | Wrong season; fully woody stems; low light/cool temps | Take cuttings in late spring/early fall; choose semi-ripe growth; add warmth and light |
| Wilts immediately after uncovering | Roots not established yet | Re-cover for several more days; open bag gradually over a week |
If your cuttings keep struggling despite these fixes, review our full rosemary care guide, which covers light, soil, and watering in more depth than a propagation-only guide can.
Varieties & Flavor
Most garden rosemary is Salvia rosmarinus (formerly Rosmarinus officinalis). Varieties differ in habit, flower color, and aroma:
- Upright: ‘Miss Jessopp’s Upright’ (vigorous, light blue flowers)
- Trailing/semi-trailing: ‘Foxtail’, ‘Capri’ (great for containers)
- Flower color: Blue is common; ‘Rosea’ (pink), ‘Lady in White’ (white)
- Scent/flavor: ‘Green Ginger’ has a gingery aroma, fun for culinary experiments
Cloning preserves these traits exactly, unlike seed-grown plants. Rosemary also propagates well alongside other kitchen staples; if you’re building out a windowsill collection, check our roundup of best herbs to grow indoors for companion picks.
Aftercare
From Rooted Cutting to Harvest-Ready Plant
- Light: Full sun once established; bright indirect light while rooting.
- Water: Let the top inch dry between waterings; never sit in soggy mix.
- Feeding: Not needed in the ground; light granular feed in late spring for container plants after year one.
- Pruning: Trim lightly after flowering to keep bushy; avoid cutting into old wood.
- Harvest: Snip sprigs year-round; best flavor from soft new growth in late spring/summer. Once you’re harvesting more than you can use fresh, our guide on drying and storing rosemary will help you preserve the surplus.
Read more: How to Harvest Rosemary (Without Killing the Plant)
Before you move a rooted cutting into its final pot, it also helps to review proper hardening off for seedlings and cuttings so the young plant doesn’t get shocked by changes in light and airflow.
Common Mistakes to Avoid
- Using fully woody stems (slow or no rooting)
- Overwatering or “moist” soil that stays wet (rot)
- Not changing water daily in water propagation (bacteria/rot)
- Skipping drainage holes or using heavy soil (root rot)
- Taking cuttings in winter or peak summer heat (low success)
Frequesntly asked Questions
How long does it take for rosemary cuttings to root?
Generally, 2–6 weeks. However, water cuttings often show roots sooner, whereas soil cuttings develop stronger roots.
Do I need rooting hormone?
No, but it can increase success by ~35%. Dip only the cut end; tap off excess.
Can I propagate store-bought rosemary?
Sometimes, but supermarket herbs may be dried or treated, lowering success. Fresh, local cuttings root better.
Should I cover cuttings with a bag?
Helpful for soil propagation to retain humidity. Check for condensation and open gradually once rooted.
How many cuttings should I take?
More than you need. Expect some losses; it’s normal.
Final Thoughts
Rosemary is one of the most rewarding herbs to propagate: a few snips today can become a steady supply of fresh sprigs for years. For the highest success rate and strongest plants, root cuttings in a gritty, well-draining mix and keep moisture disciplined. If you love seeing roots form, water propagation works well; just change the water daily and pot up promptly.
Start with more cuttings than you think you need, take them in late spring or early fall, and focus on semi-ripe growth. With a little patience and the right conditions, you’ll reliably grow more rosemary from cuttings without buying new plants.